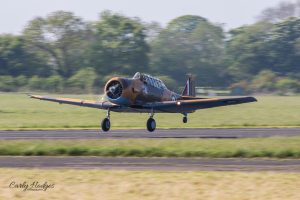
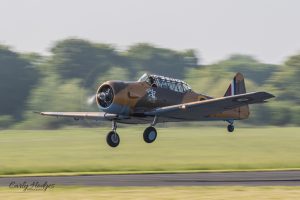
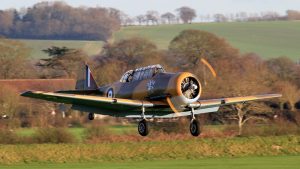
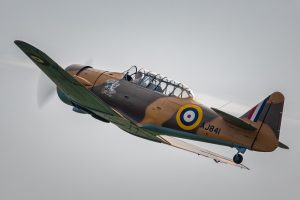
WHY FLY FROM THE BACKSEAT?
 Any pilot aspiring to fly a high-performance World War II fighter will likely find himself in the backseat of an AT-6/SNJ North American Texan Advanced Trainer. The reasoning behind requiring a pilot to check out and fly from the back seat is that he has to learn to fly with his peripheral vision and develop techniques and procedures to maintain awareness about the location of the runway even though the runway is obscured by to long nose of the aircraft. Besides having to learn to acquire orientation and maintain situational awareness with far less visual information, the pilot also develops a better feel for the aircraft, since sitting in the backseat, the moment arm or distance between the pilot and the propeller and its gyroscopic force is increased. The aircraft feels more sensitive sitting behind the centre gravity. This article will briefly discuss some of the aspects of flying a Texan from the backseat.
PROCEDURES WITH THE PILOT IN THE FRONT SEAT
If you are going to fly a Texan from the backseat, you are going to require a pilot and/or instructor to occupy the front seat. The pilot in the front seat will be required to select the radio frequencies, retract and extend the landing gear and give you a reading on your flap setting. He will also be required to start the aircraft. As a backseat pilot, you will have to find ways to communicate your desire for the front seat pilot as he accomplishes tasks in preparing the aircraft for flight or landing.
 Before start, the first step is to make sure that there is communication between the pilot in the front seat and the pilot in the backseat. Following a communication check, the pilot in the front seat will begin going down the pre-start checklist. Once that checklist is completed and the engine is started, then the pilot in the front seat will typically coordinate with a marshaller to verify that it is safe to begin the taxi of the aircraft, especially if the aircraft is situated in a confined area and surrounded by other aircraft. Once the marshaller has given the crew in the Texan clearance to taxi, the front seat pilot may turn control of the aircraft over to the pilot in the backseat. Sitting in the backseat, your forward visibility is nil, so you have to be very careful about proceeding forward unless the front seat pilot advises that the area ahead of you is clear of traffic and obstructions.
As you contemplate advancing the power and taxiing forward, you have to be aware of the fact that not only is your forward visibility severely compromised, but if you have got to make a turn in a fairly confined area, then you are going to have to unlock the tail wheel to make the turn. People with experience in Texans understand that advancing the power and commencing a turn with a tailwheel unlocked can result in some fairly abrupt turning of the aircraft, and this requires that the turn be controlled with braking pressure and/or opposite rudder, especially if the turn becomes fairly pronounced and requires that it be dampened in terms of its speed of rotation.
After you have departed the parking area and are taxiing forward with the tail wheel locked, you still have to clear the taxi area in front of you. This requires S turns, left and right so that you can see around the nose (not over the nose) and can clear the area before you. The turns left and right may have to be fairly sharp, and you are going to be best served if the canopy is open. You will need to get your head outside of the canopy area into the slipstream to look around the canopy and around the aircraft to survey the real estate in front of the aircraft as you taxi left and right in your S turn manoeuvres.
Eventually, you will make your way to the run-up area. If the run-up area is fairly confined, you may once again have to unlock the tail wheel to turn the aircraft and manoeuvre the aircraft in the run-up area so as not to blast other aircraft with your prop wash while you engage in your run-up. As you commence your turn to position your aircraft for the run-up, think about what you are going to do after the run-up is complete. As a general rule, you will want to cock the nose to the opposite direction from your initial turn after the run-up is complete. For example, if after the run-up, you are going to turn right, you will want to cock the nose to the left to give yourself an angle so you can verify the area in front of you is clear for the taxi. Conversely, if the initial turn is left, you will cock the nose to the right to give yourself a visual perspective on whether the area in front of you is clear for a taxi after your run-up is complete. Performing the run-up in the backseat of the aircraft is no different from performing the run-up in the front seat of the aircraft. The procedures are the same. After your run-up is complete, you will tell your front seat pilot that the run-up is complete, and he will broadcast intentions on the CTAF (if this is an uncontrolled field) of the intention for your aircraft to depart on the active runway.
Now, before you take the active runway, you have to make certain the runway environment is clear. If for example, the active runway has a magnetic orientation of 090 degrees, if you turn the aircraft to 270 degrees, you are simply looking in the opposite direction from the approach path to the runway, but such an orientation may not be sufficient for you to see whether there are aircraft on final. You may have to turn the aircraft to a magnetic orientation of 240 degrees to give yourself an adequate view around the nose of the aircraft and verify that there is no traffic on final for the active runway.
After you have determined that the approach path to the runway is clear, you then have to determine that the runway is clear. You will typically call out to the front seat pilot that you have cleared the final approach zone to the runway and it is clear, and then as you taxi onto the runway, you will look down the runway and call out that the runway ahead is clear. This discipline in the procedure of calling out that the final approach zone is clear and that the runway is clear is important and will serve you well later in life when you transition to a high-performance fighter aircraft and you cannot see over the nose of that aircraft.
TAKEOFF AND FLYING PROCEDURES
 After you take the active runway, you will realize that there is no forward visibility. All you can discern about your orientation to the runway is in relation to your left and right wings and the runway environment is apparent to you about 45 or 50 degrees away from the nose of the aircraft. You have to acquire some comfort level with this peripheral vision environment because this is all that is available to you as you advance the power for takeoff. When you advance the power for takeoff, your best bet is going to be to keep the stick back and to advance the power smoothly to full takeoff power (36” x 2,250 rpm. One thing you do not want to do is to advance the power slowly and allow the tail to rise and then complete applying additional power. This will result in your having to solve the problem of dealing with gyroscopic forces while the tail of the aircraft is off the runway in a reduced visibility environment. You can hurt yourself and hurt the aircraft by doing so. Accordingly, your best bet is to get the power-up smoothly to full takeoff power fairly promptly and then monitor the aircraft’s position relative to the two edges of the runway to make sure you stay in the general vicinity of the centerline of the runway during takeoff. As the aircraft accelerates with full takeoff power, you will note that the controls feel delicate and more sensitive in the backseat of the aircraft as opposed to the front seat of the aircraft. At least, that has been my experience.
 As the aircraft accelerates, you would typically take off in a three-point attitude. The aircraft will easily be airborne by 80 miles per hour. Because your best angle of climb (Vx) is 90 miles per hour, you won’t let the aircraft accelerate to 90 miles per hour and when there is no runway available to effect a safe landing, call for the pilot in the front seat to retract the landing gear. To minimize your exposure to trees and obstacles which surround the airport, you will typically want to maintain 90 miles per hour in the climb until any potential obstacles surrounding the airport have been cleared. You can then smoothly transition to the best angle of climb speed (Vy) which is 110 miles per hour and smoothly bring the power back to climb power which is 30 inches of manifold pressure and 2,000 rpm.
As you climb out on your upwind leg, you probably will make some S turns left and right to clear the sky in front of you. As was the case taxiing on the ground, you cannot see over the nose, so you have to see around the nose of the aircraft.
If you are going to shoot a series of landings, then as you turn from the upwind leg to crosswind leg, you will be thinking about arriving at your pattern altitude. You may gradually bring your power back from 30 inches to 25 inches and eventually to 20 inches as you turn for the left downwind leg. You will want to put your left wingtip on the edge of the runway, the same sight picture you would employ flying from the front seat. Approaching the midfield downwind leg, you will call to your pilot up front to put the gear down, and he will confirm the gear is down and locked. You will then call out the pre-landing checklist of gas, undercarriage, mixture, prop and shoulder harnesses locked, and you will confirm that the pre-landing checklist is complete. Now, flying the downwind leg, your manifold pressure should be at about 19 inches and your airspeed should be at about 110 mph. This airspeed will allow you to deploy the flaps. As you are abeam the runway numbers, you will depress the power push mechanism that powers the hydraulic system that powers the flaps and then manipulate the flap lever from full forward to aft and then put it in the centre (neutral) position. In the backseat of the aircraft, there is no flap position indicator. You have to rely upon the front seat pilot to tell you the position of the flaps. So after applying the power push and positioning the flap lever full aft and then neutral, you will call the front seat pilot and ask him for the position of the flaps.
 Your target airspeed is now 100 mph as you turn from downwind to base. Then, as the base leg continues, you want to get your airspeed back to 90 mph. Turning from base to final, you would like to be at 500 feet and 90 mph. You may find that your awareness of the position of the runway relative to the aircraft is enhanced if you make a curving approach as opposed to a square approach. A curving approach will allow you to maintain some degree of overshoot angle on the runway and then turn towards the magnetic orientation of the runway later in the landing approach thereby giving you some awareness of the position of the runway relative to the aircraft throughout most of your approach. If you are forced by other traffic to fly a long final approach, you may perform S turns to keep an awareness about the location of the runway.
As you roll out on final approach, if you were doing a curving approach and the left edge of the runway was your orientation device, at some point as you progress downward toward the runway, you are going to have to transition your vision not only to the left side of the runway but to both sides of the runway so that the aircraft is positioned more or less on the centerline of the runway. Again, peripheral vision is key. As the aircraft continues its descent towards the runway, at some point you will discern that the aircraft is fairly close to the runway and you will elect to either execute a wheel landing or a three-point landing. For pilots new to the back seat, a wheel landing may be best, since the sight picture for a three-point landing from the backseat may be difficult to acquire, at least initially. After touchdown, your focus is on keeping the two runway edge markers relatively equal in distance to ensure the aircraft remains more or less on the centerline of the runway during rollout.
 One problem you may experience in landing from the backseat of the Texan is that you lose awareness about how much runway has been used and how much runway remains. From the front seat, it is fairly simple. You can see how much runway is available. From the backseat, you have to rely upon fixed distance markers on the runway or other elements of the runway environment to give you a clue about how much runway remains.
After you taxi clear of the runway, remember to cant the aeroplane away from the initial direction of your taxi. For example, after you have cleared the runway, if the taxiway is to your right, you will turn slightly to your left to give yourself an angle to see around the nose of the aircraft to clear that area for a taxi after your landing checklist has been completed. It is considered poor form to taxi straight ahead after your landing checklist has been completed. If you fail to cant the aircraft away from your initial turn, one thing you can do after your landing checklist is completed is to deliberately turn momentarily to the left and clear the area to the right and then turn the aircraft to the right and taxi along the taxiway. What you and your instructor pilot in the front seat are looking for is an awareness that you have to clear the area in front of you before taxiing. As you taxi, you will return to your S turn manoeuvres to clear the area in front of you as you taxi along the taxiway.
GO-AROUND PROCEDURES
 As a new pilot transitioning to the backseat of a Texan, sooner or later you are going to have an approach that is not optimal. You are going to have to have a procedure in your back pocket to abort the approach and execute a go-around. You will find yourself well served to practice go-arounds at low altitude in close proximity to the runway. The reason for doing deliberate go-arounds is to develop a comfort level with go-arounds in the event your landing goes sour at some point in the process. If the aircraft is not aligned with the runway or if you have lost visual orientation on the runway, you will smoothly and promptly go to 30 inches of manifold pressure and 2,000 rpm, which is climb power and climb out at 90 miles per hour indicated. Once you have achieved a positive rate call for gear up. You will continue to climb at 90 mph until the aircraft has climbed 200 feet higher than the altitude when the go-around procedure was commenced. Then, you will push the power push mechanism to activate the hydraulic power and smoothly and slowly bring the flap lever from the neutral position to the up position. If this is done very smoothly and slowly then the flaps will come up fairly slowly and that will prevent the sinking sensation you will get if you abruptly retract the flaps. One thing you may consider is practising manipulating the flaps on the ground when the aircraft is idle to become accustomed to moving the flap handle from the neutral position to the up position very slowly so that the flaps will not retract quickly during your go-around procedures.
TAXI IN AND SHUTDOWN
 After your landing has been accomplished and you have taxied back to the base, you will want to continue to observe your S turning and canting procedures to ensure that the taxiway environment before you is clear. As you taxi to the parking area, you will want to keep the marshaller insight and follow his instructions. Remember, keeping the marshaller insight is going to be more difficult from the backseat than the front seat, so use special caution at this time.
The marshaller may direct you to make an abrupt turn or sharp turn, and once again, this will require to unlock- ing the tail wheel. Because the aircraft can turn sharply with an unlocked tail wheel, be judicious in your application of rudder pressure to effect the turn and be prepared to apply opposite rudder and braking, if necessary, to arrest the turn in the event the rate of turn becomes excessive.
Prior to shutting down, you will verify that the front seat pilot has turned off the radios, and then you will follow your normal shut down procedure of advancing the power to 1200 rpm and then collapsing the propeller such that the rpm generally deteriorates from 1200 rpm to 800 rpm. You will allow the engine to scavenge oil from the propeller governor for one minute before reducing the power and momentarily turning off the magnetos to verify that you do not have a grounded wire on a magneto. Then you will pull the mixture control to the full aft position to shut off the engine.
CONCLUSION
Even pilots with hundreds of hours in Texans will find flying from the backseat a new environment. You have no forward visibility looking directly in front of you, and you have to learn to adapt to employing your peripheral vision to maintain situational awareness. In flying the aircraft, there really is not a great deal to see in front of you, and flying from the backseat in cruise flight feels almost like an instrument check-ride. Most of what you can see is in the flight instruments directly in front of you. Again, S turns are required to maintain an awareness of your orientation to landmarks, the runway, and potential traffic. Without question, flying a Texan from the backseat is a unique challenge and opportunity to advance your flying skills.